Friday 19 December 2014

Merry Christmas and A Happy New Year :-)

Hello busy bloggers preparing for Christmas :-)
 
 
So guess what?!?! I had a little me time to create... YES! I needed it Lol... So I did a tiny Black Friday haul and got me some Sizzix Xmas dies and Cinch Binding Machine (happy dance) my Christmas gift to myself ;-)
 
I couldn't wait to use the dies and these are what I created... I had to get the Xmas making projects outta my system. It's not a lot but atleast I can say I made something, right LOL


I want to thank you all for your support throughout 2014 and wish you all a very Merry Christmas and a Happy New Year :-)
 
Take care and God Bless!
 
{{hugs}}
 
~Steff~

Saturday 22 November 2014

Gift Boxes...

Hello my blogging friends!!!
 
 
Yes I know I know it's been AWHILE but it was not that I didn't want to blog, it was a crazy and stressful time for me. But things are looking up slowly so here I am :-)
 
 
I made these chipboard gift boxes using Cynthialoowho Templates "Square Stacked Boxes" and you can find her templates HERE 


The largest box measures 8" x 8" and 5" high
Medium box 6" x 6" and 4 1/2" high
Small box 4" x 4" and 4" high
 
You can decorate them in any style and can be used as pretty storage.
 
Thanks for stopping by :-)
 
~Steff~


Friday 15 August 2014

Die-Versions/Sparkle N Sprinkle Joint Blog Hop


Welcome to the Die-Versions and Sparkle N Sprinkle Blog Hop!

The joint blog hop with Die-Versions and Sparkle N Sprinkle begins today (7am EST) and goes until Aug 17th (5pm EST), so there will be plenty of time to check out all the great projects created by both teams.  The theme is Christmas, so you'll get lots of great inspiration for your upcoming Holiday cards.

Die-Versions manufactures low profile dies made right here in the United States and Sparkle N Sprinkle manufactures rubber stamps, glitters, embossing powders, and flocking, also made in the US.  This is like a match made in heaven - low profile dies combined with lots of bling!  Doesn't get much better than that.

One winner will receive a Grand Prize consisting of a $50 gift certificate from Die-Versions and a $50 gift certificate from Sparkle N Sprinkle, for a total of $100.  The winner will be announced on Aug 17th on both the DV Blog and the SNS Blog as well as their Facebook pages.

In order to be eligible for the Grand Prize, please: 
  • Leave a comment on each Designer's blog
  • Follow both companies on Facebook (DV Facebook pageSNS Facebook page) if you haven't already so you can keep up to date on all the latest goings on.   (I'm sure that all of the Designers would love for you to Follow them too, but that isn't a requirement to win this prize.)  

You should have arrived here from Emmy's blog.  If not, then you should begin at the Die-Versions Blog and end at the Sparkle N Sprinkle Blog.  If you get lost along the way, you can go to either the DV Blog or the SNS Blog to see the complete list of participants.

We'd love it if you'd like to leave a comment at either the DV Blog or the SNS Blog telling us which projects were your favorites.  :-)


I have two projects to share with you using the lovely products from both companies.  Click Merry Xmas and Joy for a step by step on how I created them.

Card 1 using DV Whispers Holiday Word Ornaments and SNS Firecracker Red embossing powder on ornaments, Fire Engine Red on the berries, and Goldenrod on the bows.  


close up :-)


Card 2 "Joy" using the Holiday Word Ornaments and "Scrolly Bow" and SNS Lana Pink embossing powder on the Bow, Ornament and Snowflakes, White Detail embossing powder on the Snowman, Silver Pearl embossing powder on background dots.


close up :-)


Your next stop on the blog hop is Anita.  I know she has something special in store for you.

We hope you enjoy this blog hop and it gives you lots of inspiration!  Don't forget to leave each of us a comment and follow both Die-Versions and Sparkle N Sprinkle on Facebook.

Thanks for stopping by and hope to see you again :-)

Tuesday 12 August 2014

Prom 2014 Camera Mini Album

Hello bloggers :-)
Say "cheese"!
 
 
I was commissioned for this Prom mini album and was so happy with the turn out that I want to make another one lol... I decided to used the Sizzix Ellison large Camera Die mini album because I though it was cool for a teenager. It was gifted to me by my dear friend "Tere" thank you!
I ask the mom what color was her daughter's dress and she showed me a picture and I made a dressform (in the lens) inspired by the her dress - love it!
 
So enough chattering and let me overwhelm you with photos - sorry! LOL...


Small camera die cut inside are from Tim Holtz camera die, it's not completely adhere... she can slip a photo inside.


The papers are from DCWV "The Lace and Linen" stack. Embellishements are from Prima and Journaling cards are Prima's Rondelle collection.
 
Thanks for stopping by, really appreciate it!
 
~Steff~


Thursday 7 August 2014

"Gorgeous" Canvas

Hi there bloggers :-)
 
 
I would like to share with you a 6x6 canvas that I altered for my GDT spot for ReneaBouquets and you can also find her on Etsy . Renea makes absolutely gorgeous "Handcrafted" Butterflies and they are amazing when you see them in person.
So I have created my canvas which was inspired by the gorgeous butterflies, which by the way are called "Patina butterflies".


For my background I used Prima stencil and homemade texture paste for the waves and the sentiment. Then sprayed with some Lindys Stamp Gang mist and ink the edges with Tim Holtz "Broken China" distress ink. Stamp Prima's Bloom girl with Memento Tuxedo Black ink and color her with water color pencils (thanks again my friend!) Added pearls and Sparkle N Sprinkle Teal Velveteen glitter to the flowers in her hair to finish her off.
 
She's looking at the butterflies and thinking "Gorgeous" :-) The butterflies trails are made with Martha Stewart mold and top off with Sparkle N Sprinkle Luau Green glitter.
 
I really enjoyed creating this canvas and the butterflies made creating effortless :-) Check out Renea's awesome store, she has so much more than butterflies.
 
~Steff~

Tuesday 5 August 2014

Heads Up! Die-Versions/Sparkle N Sprinkle Joint Blog Hop

Guess what's coming in August?


A joint blog hop with Die-Versions and Sparkle N Sprinkle. It will begin Aug 15 at 7am EST and go through Aug 17th, so there will be plenty of time to check out all the great projects created by both teams. The theme will be Christmas, so you'll get lots of great inspiration for your upcoming Holiday cards.

The winner will receive a Grand Prize consisting of a $50 gift certificate from Die-Versions and a $50 gift certificate from Sparkle N Sprinkle, for a total of $100.

Die Versions manufactures low profile dies made right here in the United States and Sparkle N Sprinkle manufactures rubber stamps, glitters, embossing powders, and flocking, also made in the US. This is like a match made in heaven - low profile dies combined with lots of glitter, embossing powder, and flocking. Doesn't get much better than that.

Here is a sneak peak of some of the goodies that both teams received:


So mark your calendars now because this is one blog hop you won't want to miss!


Sunday 3 August 2014

The WINNER is....

Hi everyone :-)

Thanks to everyone who participated in this month's release. One Grand Prize winner will win the entire collection revealed this month!

This month SIX new stamp sets were introduced. All the sets are available on Cling Mounted Rubber and as a digital image. The Sunflower, set #643 is the stamp set featured in This Month's Technique Video.

The sets are:


Knight Owl #632 (Digi version: DIGI632)
Sunflower #643 (Digi version: DIGI643)
A Little Note #645 (Digi version: DIGI645)
Pilgrim Thanksgiving #646 (Digi version: DIGI646)
Wisps of Autumn #647 (Digi version: DIGI647)
Witchy Gerty #648 (Digi version: DIGI648)


One Grand Prize Winner was selected from the comments left on the participating Designers' blogs. The Grand Prize Winner will receive their choice of:

1) each of the new rubber stamp sets
or
2) all the new digital stamps and digital stamp sets.

Congratulations goes to
Mary Holshouser,
who commented on Belinda's blog:

I love to make step cards but seem to have trouble finding enough matching items to completely embellish it. Love the way you made this one. I'll remember this for my next step card.
thanks for sharing.

Please email Anne at icinganne@yahoo.com to claim your prize. Be sure to include your mailing address.


Hugs from The Sparkle Team,


Thursday 31 July 2014

Sparkle N Sprinkle August 1st Reveal

Hello bloggers :-)
 
It's that time again...


Welcome to Sparkle N Sprinkle's August 1 Reveal.

This month SIX new stamp sets are being introduced. These sets are 20% off their regular price, until August 3rd. All the sets are available on Cling Mounted Rubber and as a digital image. The Sunflower, set #643 is the stamp set featured in This Month's Technique Video.

The sets are:


Knight Owl #632 (Digi version: DIGI632)
Sunflower #643 (Digi version: DIGI643)
A Little Note #645 (Digi version: DIGI645)
Pilgrim Thanksgiving #646 (Digi version: DIGI646)
Wisps of Autumn #647 (Digi version: DIGI647)
Witchy Gerty #648 (Digi version: DIGI648)

On August 3rd, one Grand Prize Winner will be selected from the comments left on the designers' blogs listed below. The Grand Prize Winner will receive their choice of:

1) all SIX of the new rubber stamp sets
or
2) all the new digital stamps and digital stamp sets.

The new SNS Creative Challenges also begins today, with lots of prizes and recognition badges.


The winner of the blog hop will be announced on August 3 on Facebook, the SNS blog, and on our blogs:


Don't forget to leave a comment with each Designer to be eligible for the Grand Prize. We love reading your comments and hope we have inspired you as well. If you absolutely can not leave a comment for some reason, please email icinganne@yahoo.com with your comment and the name of the blog or Designer you are commenting about.
 
We hope you enjoy the New Reveals as much as we do!
Wonder which Designer contains the Grand Prize this month?
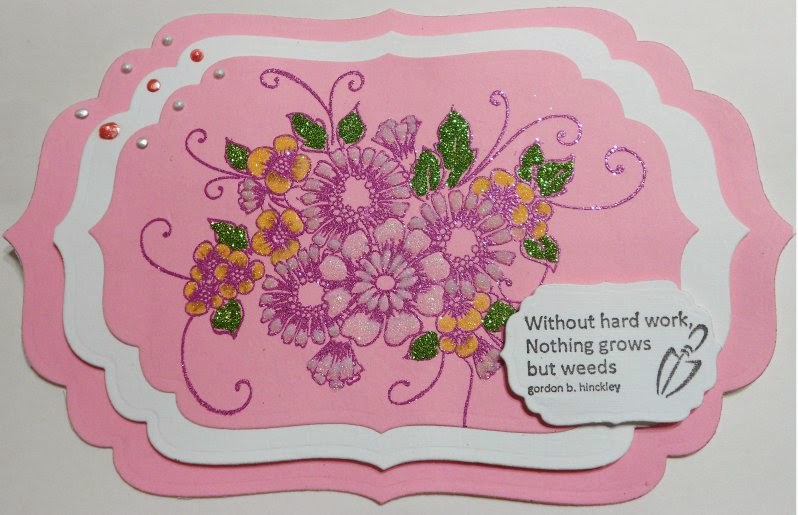
For my card I used Pilgrim Thanksgiving Stamp set and I love it :-) 

Absolutely love this image sitting on the Burlap background!


The font is lovely and the 
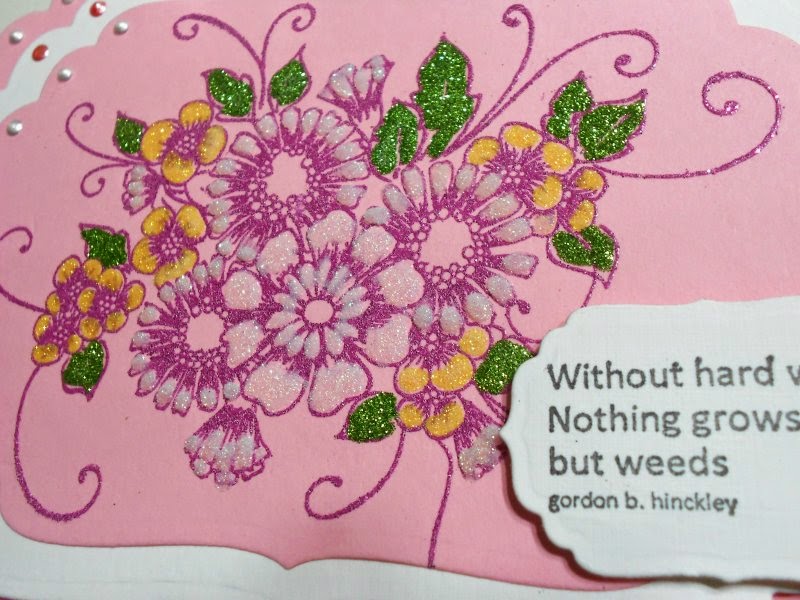
Black Detail embossing powder... Perfect!
 
Little touches of glitters made it dimensional.
How I created it:
1.     Cut card base at 5” x 5” from Kraft stock, adhere layer of designer paper cut at 4.75” x 4.5” with Tear-ific Tape.
2.     Die cut using the largest SB labels two die from Burlap Paper. Using that same die trace the outside edge on kraft paper and cut with scissors, this is to give your burlap die cut a matting with the same shape. Adhere again with Tear-ific Tape.
3.     Using dimensional foam tape to adhere the die cut layers to card base, leaving space at the top for embellishments.
4.     Stamp, color with water color pencils and fussy cut image from Pilgrim Thanksgiving. Add a touch of Fire Engine Red glitters to the apples and Autumn Medley glitters to the Turkey tail feathers.
5.     Stamp using VersaMark ink pad and heat embossed sentiment from Pilgrim Thanksgiving stamp set using Black Detail embossing powder on Kraft cardstock.
6.     Adhere both fussy cut image and sentiment on the Burlap die cut using Fabri-tac glue.
  1. Die cut Dainty Bow from Burlap Paper and add acrylic apple button as bow center. Adhere top center of card.
Thank you for playing along and check out the other designers awesome projects!
~Steff~

Friday 25 July 2014

~Daisies~

Hi bloggers :-)
 
Steff here with a card share featuring Sparkle N Sprinkle Daisies stamp set which is so pretty with all its swirls.  


Absolutley LOVE all the sparkle from the embossing powder and glitters!


More close up :-)
 

What I did:
 

1.     Choose three sizes from SB Grand Labels Four dies. From the pink cardstock cut your card base using the largest of the three sizes chosen and the smallest for the image. Die cut the white cardstock using the middle size die for the image matting.

2.     On the smaller pink die cut, using VersaMark embossing ink pad, stamp and heat embossed Daisies with Mulberry Star embossing powder.

3.     Color in flowers and daisies using Dimensional Glue with Daisy, Cloud Nine and LuauGreen glitters.

4.     Adhere pink cardstock with image to white cardstock for a contrasting layer. Next adhere to the pink card base using dimensional foam tape.

5.     Stamp sentiment with Versa Magic “Midnight Black” ink. Choose an appropriate size SB labels four die cut to fit sentiment from Daisies stamp set. Adhere to card front using dimensional foam tape.
 
6.  Accent each layer of card using Ranger’s Liquid Pearl in colors white and pink.
 
Thanks for stopping by and I hope you give these glitters and embossing powders a try :-)
 
~Steff~


Friday 11 July 2014

Blessings to you...

Hi there :-)
  
It's never too early to think and plan Christmas cards for our love ones, so I have a beautiful stamp set to share with you for inspiration.
 
 Card created using A Savior stamp set #00-637P5
 
 
The image sits on Vellum which I love.
 
 See the beautiful Cloud Nine glitter!


 Love this Super Thick White embossing powder!

 
Lovely message from A Savior stamp set.
 
How I created it:
 
1.     Cut white cardstock measuring 5”x5.75” and scored at 2.75” Your card front panel will be shorter than your back panel.
2.     On a strip of white cardstock punch border using Martha Stewart’s Floral Vine punch and adhere to the front panel with the border edge positioned off the card front panel.
3.     Using Tear-ific Tape and Cloud Nine glitter to create a glitter background as shown in the SNS “Amazing Striped Backgrounds” Technique on the card front.
4.     To accent the punched border, use Brushable glue with applicator and Cloud Nine glitter.
5.     Cut two frames from white cardstock using Tim Holtz Vintage Cabinet Die/Movers and Shapers, heat embossed front frame with VersaMark ink pad and Super Thick White embossing powder.
6.     Cut Vintage Cabinet die from Vellum, stamp and heat embossed image from  “A Savior” stamp set using Black Detail embossing powder. Color image with Kimberly Water Color Pencils and then adhere between both frames. Adhere frame top center of card front.
7.     Using Brushable glue and Cloud Nine glitter to accent the Halos in the image and Glodenrod glitter for the star.
8.     Stamp and heat embossed sentiment with Black Detail on white cardstock fashioned in a fishtail ribbon and accent both ends with flatback pearls.
9.     Stamp message from “A Savior” stamp set inside card using VersaMagic Midnight Black.
 
I hope you were inspired to give this stamp set a try and also the fun glitters and embossing powders used :-)

**Thank you my dear friend for Watercolor Pencils ;-)
 
Until next time...
 
~Steff~